-
Table of Contents
“Unlock the Art of Perfection: Mastering Crystal-Clear Resin Finishes!”
Achieving crystal-clear resin finishes is a sought-after goal for artists, crafters, and DIY enthusiasts alike. The allure of a flawless, glossy surface can elevate projects, from jewelry to home decor, enhancing their aesthetic appeal and durability. To attain this level of clarity, it is essential to understand the properties of resin, the importance of proper mixing techniques, and the environmental factors that can affect the final outcome. This guide will outline the key steps and best practices to ensure a stunning, transparent finish that showcases the beauty of your work.
Surface Preparation Techniques for Resin Finishes
Achieving a crystal-clear resin finish is a meticulous process that begins long before the resin is mixed and poured. The foundation of a flawless finish lies in the surface preparation techniques employed prior to application. Proper preparation not only enhances the aesthetic appeal of the final product but also ensures durability and longevity. Therefore, understanding the steps involved in preparing the surface is crucial for anyone looking to achieve professional-quality results.
To begin with, the surface must be clean and free from any contaminants. Dust, grease, and oils can interfere with the adhesion of the resin, leading to imperfections in the finish. Thus, it is essential to thoroughly clean the surface using a suitable cleaner, such as isopropyl alcohol or a mild detergent solution. After cleaning, it is advisable to wipe the surface with a lint-free cloth to eliminate any remaining particles. This initial step sets the stage for a successful resin application.
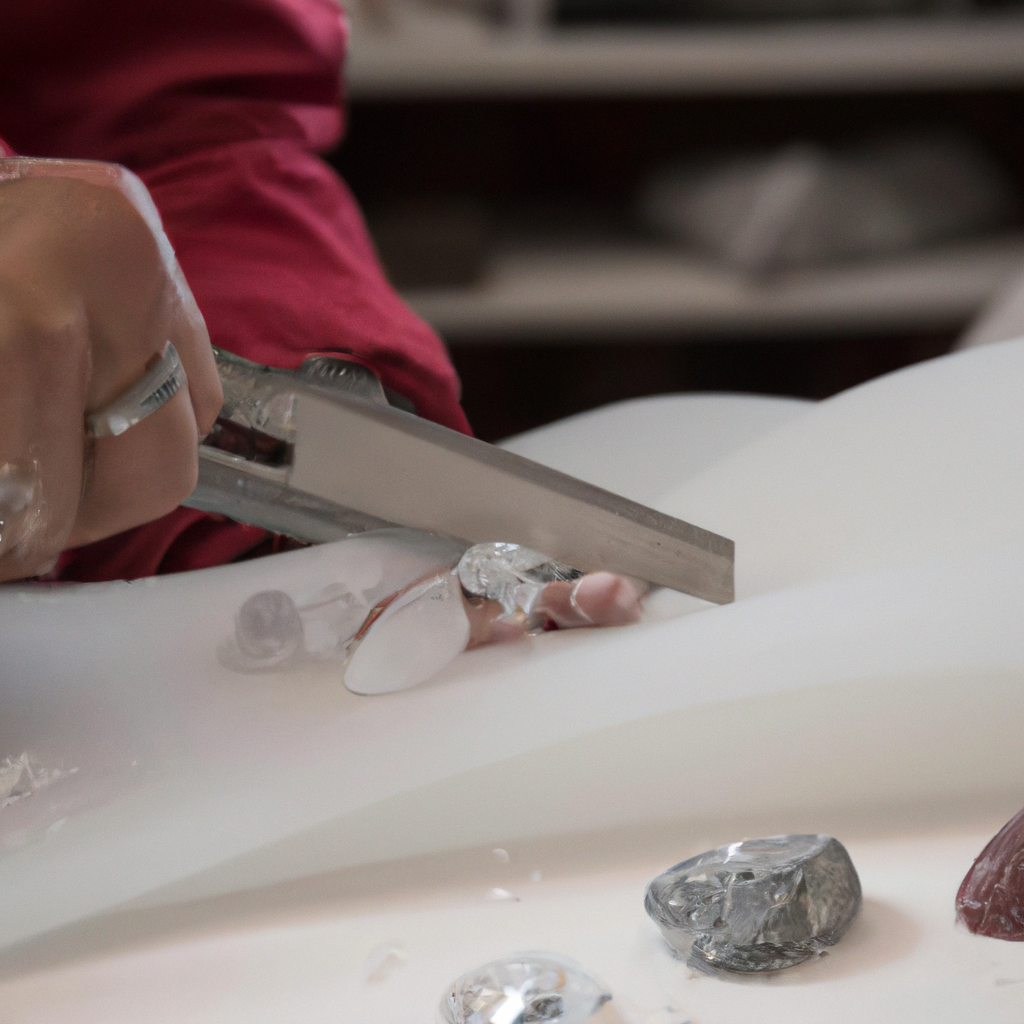
Once the surface is clean, the next step involves assessing its texture. A smooth surface is vital for achieving a crystal-clear finish, as any irregularities can become magnified once the resin is applied. If the surface is rough or uneven, sanding may be necessary. Using fine-grit sandpaper, one should gently sand the area to create a uniform texture. It is important to sand in a consistent manner, ensuring that the entire surface is treated evenly. After sanding, it is crucial to remove any dust created during this process, as it can also lead to imperfections in the final finish.
In addition to sanding, priming the surface can significantly enhance the adhesion of the resin. A suitable primer creates a bonding layer that helps the resin adhere more effectively, reducing the likelihood of bubbles or peeling. When selecting a primer, it is essential to choose one that is compatible with the type of resin being used. Applying a thin, even coat of primer and allowing it to dry completely will provide a solid foundation for the resin application.
Furthermore, it is important to consider the environmental conditions in which the resin will be applied. Temperature and humidity can greatly affect the curing process and the overall appearance of the finish. Ideally, the application should take place in a controlled environment where the temperature is between 70°F and 80°F (21°C to 27°C) and humidity levels are low. This ensures that the resin cures properly and minimizes the risk of bubbles or cloudiness in the finish.
Moreover, using the right tools during application can also influence the clarity of the resin finish. A high-quality mixing container and stir stick are essential for achieving a uniform mixture. It is advisable to mix the resin slowly to avoid introducing air bubbles, which can compromise the clarity of the finish. Additionally, using a heat gun or torch to gently pass over the surface after pouring can help eliminate any trapped bubbles, further enhancing the clarity of the final product.
In conclusion, achieving a crystal-clear resin finish requires careful attention to surface preparation techniques. By ensuring that the surface is clean, smooth, and properly primed, and by considering environmental factors and using appropriate tools, one can significantly improve the quality of the resin application. These foundational steps are critical for anyone seeking to create stunning, professional-grade resin finishes that are both visually appealing and durable.
Choosing the Right Resin for Clarity
Achieving a crystal-clear resin finish is a goal for many artisans and hobbyists, particularly those working with casting, coating, or crafting projects. The clarity of the final product is significantly influenced by the type of resin chosen, making it essential to understand the various options available. When selecting a resin, one must consider factors such as the intended application, the specific properties of the resin, and the environmental conditions in which it will be used.
Epoxy resin is often the go-to choice for those seeking clarity. Known for its excellent optical properties, epoxy resin can provide a glass-like finish that enhances the visual appeal of embedded objects or surfaces. Its low viscosity allows for easy mixing and pouring, which is crucial for minimizing bubbles that can detract from clarity. However, it is important to note that not all epoxy resins are created equal. Some formulations are specifically designed for clarity, while others may contain fillers or additives that can affect transparency. Therefore, it is advisable to read product specifications carefully and select a high-quality, clear epoxy resin that explicitly states its suitability for achieving a transparent finish.
In addition to epoxy, polyurethane resin is another option that can yield impressive clarity. Polyurethane resins are known for their durability and resistance to yellowing over time, making them an excellent choice for projects exposed to UV light. While they may not always achieve the same level of clarity as epoxy, certain formulations can provide a clear finish that rivals that of epoxy resins. When choosing polyurethane, it is essential to consider the specific type, as some are designed for casting while others are better suited for coatings. Understanding the intended use will help in selecting the right formulation that meets clarity requirements.
Moreover, polyester resin is another alternative that can be considered, although it is generally less favored for projects requiring high clarity. Polyester resins tend to have a more pronounced odor and can be more challenging to work with, often requiring additional safety precautions. While they can achieve a clear finish, they are more prone to yellowing and may not provide the same level of optical clarity as epoxy or polyurethane. Therefore, for projects where clarity is paramount, polyester resin may not be the best choice.
In addition to selecting the right type of resin, proper mixing and application techniques play a crucial role in achieving a crystal-clear finish. It is vital to follow the manufacturer’s instructions regarding mixing ratios and curing times, as improper mixing can lead to cloudiness or incomplete curing. Furthermore, working in a dust-free environment and using appropriate tools can help minimize the introduction of contaminants that may compromise clarity.
Finally, it is worth noting that additives can also influence the clarity of resin finishes. While some additives are designed to enhance properties such as UV resistance or flexibility, others may introduce color or opacity. Therefore, if clarity is the primary goal, it is advisable to avoid unnecessary additives and stick to formulations that emphasize transparency.
In conclusion, achieving a crystal-clear resin finish begins with the careful selection of the right resin type, whether it be epoxy, polyurethane, or polyester. By understanding the properties of each resin and employing proper techniques, artisans can create stunning, transparent finishes that showcase their work beautifully.
Tips for Bubble-Free Pouring and Finishing
Achieving a crystal-clear resin finish is a coveted goal for many artisans and hobbyists alike. The allure of a flawless surface, unmarred by imperfections, can elevate a project from ordinary to extraordinary. However, one of the most common challenges faced during the resin pouring process is the formation of bubbles. These unsightly intrusions can detract from the overall aesthetic and integrity of the finished piece. Therefore, understanding how to minimize and eliminate bubbles is essential for anyone looking to achieve a pristine resin finish.
To begin with, selecting the right resin is crucial. Not all resins are created equal, and some are specifically formulated to reduce bubble formation. When choosing a resin, look for products that are labeled as low-viscosity or bubble-free. These formulations are designed to minimize the likelihood of air entrapment during the mixing and pouring processes. Additionally, it is advisable to follow the manufacturer’s instructions meticulously, as variations in mixing ratios can lead to unexpected results, including increased bubble formation.
Once the appropriate resin has been selected, the next step involves the mixing process. It is essential to mix the resin and hardener thoroughly but gently. Stirring too vigorously can introduce air into the mixture, leading to bubbles. Instead, use a slow and steady motion, scraping the sides and bottom of the mixing container to ensure that all components are well combined. Furthermore, consider using a mixing stick with a flat edge, as this can help to minimize the introduction of air.
After mixing, allowing the resin to rest for a few minutes can be beneficial. During this time, bubbles that have formed may rise to the surface and dissipate. This resting period is particularly effective if the resin is poured into a larger container, as the increased surface area allows for more bubbles to escape. However, patience is key; rushing this step can result in a less-than-ideal finish.
When it comes to pouring the resin, the technique employed can significantly impact the final outcome. Pouring the resin slowly and from a height can help to reduce the formation of bubbles. Additionally, consider pouring the resin in a thin stream, allowing it to flow gently into the mold or onto the surface. This method minimizes the turbulence that can lead to air entrapment. If working with a large surface area, it may be beneficial to pour the resin in sections, allowing each layer to settle before adding more.
In addition to these techniques, utilizing heat can be an effective way to eliminate bubbles. A heat gun or a torch can be used to gently warm the surface of the resin after pouring. The heat causes the bubbles to expand and rise to the surface, where they can burst. However, caution is advised; excessive heat can cause the resin to cure improperly or create other defects. Therefore, it is essential to maintain a safe distance and use short bursts of heat.
Finally, once the resin has cured, finishing techniques can further enhance clarity. Sanding and polishing the surface can remove any minor imperfections and create a glass-like finish. Using progressively finer grits of sandpaper followed by a polishing compound will yield the best results. By following these tips for bubble-free pouring and finishing, artisans can achieve the crystal-clear resin finishes they desire, transforming their projects into stunning works of art.
Q&A
1. **What type of resin is best for achieving a crystal-clear finish?**
Use a high-quality epoxy resin specifically designed for clarity and UV resistance, as it minimizes yellowing and enhances transparency.
2. **How can I prevent bubbles in my resin pour?**
To prevent bubbles, mix the resin slowly and avoid vigorous stirring. Additionally, you can use a heat gun or torch to gently pass over the surface after pouring to pop any trapped air bubbles.
3. **What is the best way to achieve a smooth surface finish?**
Ensure the surface is clean and free of dust before pouring. After the resin has cured, sand the surface with fine-grit sandpaper and polish it with a resin polish or a suitable finishing compound for a glossy finish.To achieve crystal-clear resin finishes, it is essential to start with high-quality epoxy resin, ensure proper mixing ratios, and eliminate air bubbles through techniques such as using a heat gun or torch. Surface preparation is crucial; clean and sand surfaces to promote adhesion and clarity. Pouring in thin layers can help prevent imperfections, and maintaining a controlled environment with stable temperature and humidity will enhance the final appearance. Finally, allowing adequate curing time and performing post-cure polishing can elevate the finish to a professional level. Following these steps will result in a stunning, glass-like resin finish.