-
Table of Contents
“Craft Your Vision: Precision Modeling with UV Resin.”
Working with UV resin for precision modeling offers a unique blend of versatility and detail, making it an ideal choice for hobbyists and professionals alike. This fast-curing material allows for the creation of intricate designs and fine details that are often challenging to achieve with traditional modeling materials. UV resin’s ability to cure quickly under ultraviolet light enables modelers to work efficiently, reducing wait times and allowing for immediate handling of projects. Additionally, its clear finish and excellent adhesion properties make it suitable for a variety of applications, from miniature figures to detailed dioramas. As the popularity of UV resin continues to grow, understanding its properties and techniques becomes essential for achieving the best results in precision modeling.
Tips for Achieving Perfect Clarity in UV Resin Models
Achieving perfect clarity in UV resin models is a crucial aspect for hobbyists and professionals alike, as it significantly enhances the aesthetic appeal and realism of the final product. To begin with, selecting the right type of UV resin is essential. Not all resins are created equal; some are specifically formulated for clarity and transparency. When choosing a resin, look for products labeled as “clear” or “high clarity,” as these are designed to minimize bubbles and distortions. Additionally, it is advisable to check for any reviews or recommendations from other users, as firsthand experiences can provide valuable insights into the clarity and performance of different brands.
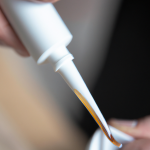
Once the appropriate resin has been selected, the next step involves proper mixing techniques. It is vital to follow the manufacturer’s instructions regarding the mixing ratio, as improper proportions can lead to cloudiness or incomplete curing. When mixing, use a clean, dust-free container and a stir stick to gently combine the resin and hardener. It is important to avoid vigorous stirring, as this can introduce air bubbles into the mixture. Instead, a slow and steady approach will help maintain the clarity of the resin. Furthermore, allowing the mixture to sit for a few minutes after stirring can enable any trapped bubbles to rise to the surface, where they can be easily removed.
In addition to careful mixing, the environment in which the resin is poured plays a significant role in achieving clarity. Ideally, the workspace should be free from dust, debris, and humidity, as these factors can compromise the final appearance of the model. To create an optimal working environment, consider using a clean, enclosed area or a dust-free box. Moreover, maintaining a consistent temperature is crucial, as extreme fluctuations can affect the curing process and lead to imperfections. A stable temperature between 20°C to 25°C (68°F to 77°F) is generally recommended for most UV resins.
When it comes to pouring the resin, technique is key. Pouring slowly and steadily from a height of about 10 to 15 centimeters can help minimize the formation of bubbles. Additionally, pouring the resin into the lowest point of the mold allows it to flow naturally, reducing the chances of trapping air. If bubbles do form during the pouring process, a heat gun or a torch can be used to gently pass over the surface of the resin. The heat will cause the bubbles to rise and pop, resulting in a smoother finish.
After pouring, curing the resin under UV light is the final step in achieving clarity. It is essential to ensure that the UV light source is appropriate for the resin being used, as different resins may require different wavelengths for optimal curing. Furthermore, curing in layers can enhance clarity; if the model is particularly thick, consider curing it in thinner layers to ensure that the light penetrates effectively. This method not only improves clarity but also reduces the risk of incomplete curing, which can lead to a cloudy appearance.
In conclusion, achieving perfect clarity in UV resin models requires careful attention to detail throughout the entire process, from selecting the right resin to employing proper mixing and pouring techniques. By creating a clean working environment and utilizing effective curing methods, modelers can significantly enhance the visual quality of their creations. With practice and patience, the pursuit of clarity in UV resin modeling can lead to stunning results that truly showcase the artistry and precision of the craft.
Essential Tools for Working with UV Resin in Precision Modeling
Working with UV resin for precision modeling requires a specific set of tools that not only enhance the crafting experience but also ensure the highest quality results. To begin with, a UV resin itself is the cornerstone of this process. This type of resin is favored for its quick curing time when exposed to UV light, allowing modelers to work efficiently without long waiting periods. However, selecting the right UV resin is crucial; one should consider factors such as viscosity, clarity, and flexibility, as these characteristics can significantly impact the final outcome of the model.
In addition to the resin, a UV light source is indispensable. UV lamps come in various forms, including handheld devices and larger stationary units. The choice of lamp often depends on the scale of the project and the intricacy of the details involved. A high-quality UV lamp ensures even curing, which is vital for achieving a smooth finish and preventing issues such as tackiness or incomplete hardening. Furthermore, it is advisable to use a lamp that emits the appropriate wavelength for the resin being used, as this will optimize the curing process.
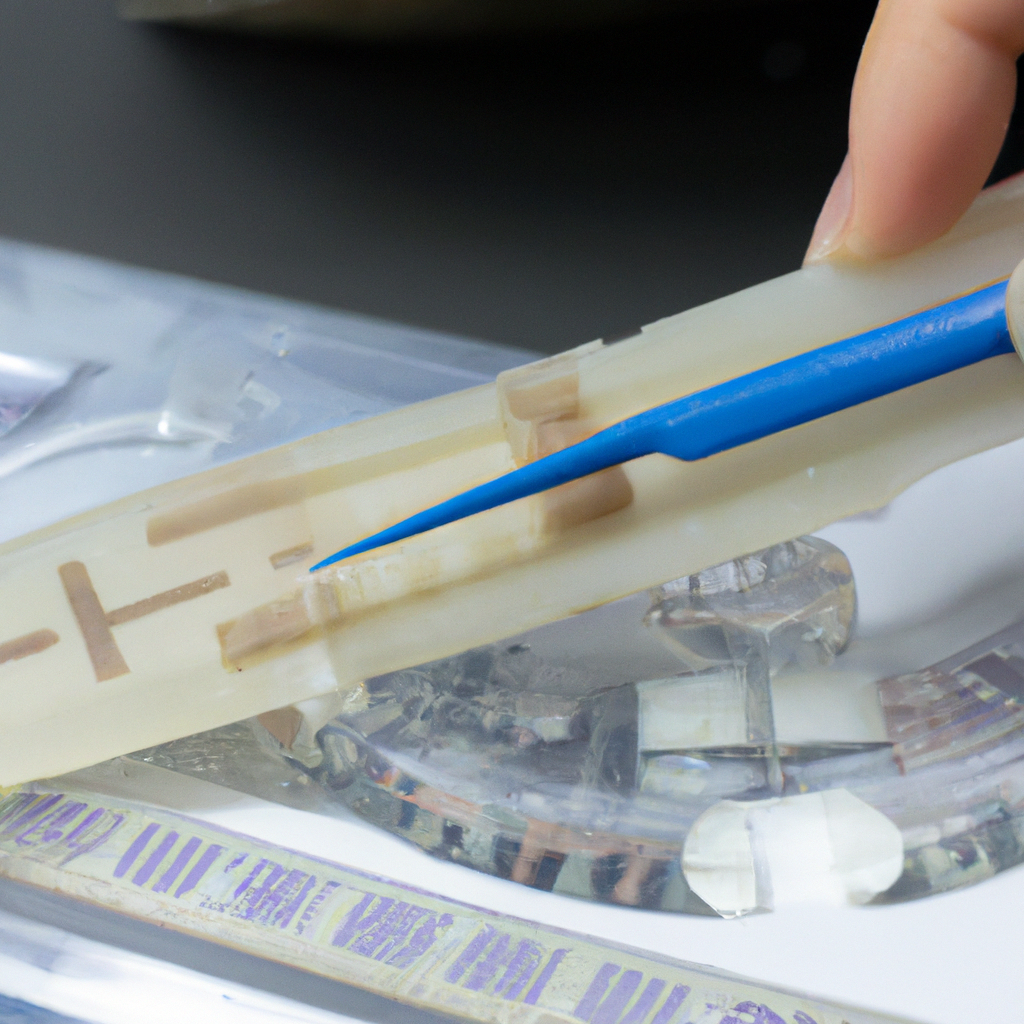
Equally important are the mixing tools. Precision modeling often requires the blending of different colors or additives into the resin. Therefore, having a set of disposable mixing cups and stir sticks is essential. These tools allow for accurate measurement and thorough mixing, which is crucial for achieving consistent results. Additionally, using silicone molds can enhance the modeling process, as they provide a reusable and flexible option for creating intricate shapes and designs. The non-stick nature of silicone also facilitates easy demolding, which is particularly beneficial for complex models.
Moreover, safety equipment should not be overlooked. While UV resin is generally safe to use, it is still advisable to wear gloves to protect the skin from potential irritation. A respirator mask can also be beneficial, especially when sanding or polishing cured resin, as this process can create fine dust particles that may be harmful if inhaled. Adequate ventilation in the workspace is another critical aspect, as it helps to dissipate any fumes that may arise during the curing process.
In addition to these fundamental tools, precision modeling often benefits from the use of additional accessories. For instance, a set of fine-tipped applicators can be invaluable for applying resin in small, detailed areas. These tools allow for greater control and precision, ensuring that the resin is placed exactly where it is needed without excess overflow. Furthermore, a heat gun can be used to eliminate bubbles that may form in the resin during mixing or curing. By gently applying heat, modelers can achieve a clearer finish, enhancing the overall appearance of the model.
Finally, a well-organized workspace is essential for effective modeling with UV resin. Having a dedicated area equipped with all necessary tools not only streamlines the process but also minimizes the risk of accidents or misplacing items. By maintaining an orderly environment, modelers can focus on their craft, leading to more successful and satisfying outcomes.
In conclusion, working with UV resin for precision modeling necessitates a variety of essential tools that contribute to both the efficiency and quality of the final product. From selecting the right resin and UV light source to utilizing appropriate mixing tools and safety equipment, each component plays a vital role in the modeling process. By investing in these tools and maintaining a well-organized workspace, modelers can enhance their skills and achieve remarkable results in their projects.
Common Mistakes to Avoid When Using UV Resin for Models
When working with UV resin for precision modeling, it is essential to be aware of common mistakes that can hinder the quality of your projects. Understanding these pitfalls not only enhances the final outcome but also streamlines the overall process, allowing for a more enjoyable crafting experience. One of the most prevalent mistakes is neglecting to prepare the workspace adequately. A clean, well-lit area is crucial, as dust and debris can easily become trapped in the resin, leading to imperfections in the finished model. Therefore, before beginning any project, take the time to ensure that your workspace is free from contaminants.
Another frequent error is failing to read the manufacturer’s instructions thoroughly. Each UV resin product may have specific requirements regarding curing times, application techniques, and safety precautions. Ignoring these guidelines can result in subpar results, such as incomplete curing or undesirable surface finishes. Consequently, it is advisable to familiarize yourself with the product specifications and adhere to them closely to achieve optimal results.
Moreover, many modelers underestimate the importance of mixing the resin properly. While some UV resins come pre-mixed, others require careful blending of components. Inadequate mixing can lead to uneven curing and affect the overall strength and clarity of the model. To avoid this issue, ensure that you mix the resin thoroughly, following the recommended ratios if applicable. Additionally, using a clean mixing tool for each batch will help prevent cross-contamination and maintain the integrity of the resin.
In addition to mixing, another common mistake is overexposing the resin to UV light. While it may seem intuitive to increase exposure time to ensure complete curing, excessive UV light can lead to brittleness or discoloration. It is essential to follow the recommended curing times and distances from the light source to achieve the best results. Furthermore, be mindful of the type of UV light used; not all UV lights are created equal, and using the wrong type can lead to inconsistent curing.
Another aspect that often goes overlooked is the importance of layering. When creating intricate models, many hobbyists tend to pour thick layers of resin in a single application. This approach can lead to trapped air bubbles and uneven curing. Instead, it is advisable to apply multiple thin layers, allowing each layer to cure fully before adding the next. This method not only enhances the clarity and detail of the model but also minimizes the risk of defects.
Additionally, it is crucial to consider the temperature and humidity of the environment in which you are working. Extreme temperatures or high humidity can adversely affect the curing process, leading to issues such as sticky surfaces or incomplete hardening. Therefore, it is wise to monitor the conditions and adjust your workspace accordingly, ensuring that it remains within the recommended range for optimal resin performance.
Lastly, many modelers overlook the importance of safety precautions when working with UV resin. While it is a versatile and user-friendly material, it is still essential to wear appropriate protective gear, such as gloves and goggles, to prevent skin irritation and eye damage. By taking these safety measures seriously, you can focus on your modeling without unnecessary distractions or health concerns.
In conclusion, avoiding these common mistakes when working with UV resin can significantly enhance the quality of your precision models. By preparing your workspace, following manufacturer instructions, mixing properly, managing exposure times, layering effectively, monitoring environmental conditions, and prioritizing safety, you can achieve impressive results that reflect your skill and dedication to the craft.
Q&A
1. **Question:** What safety precautions should be taken when working with UV resin?
**Answer:** Always work in a well-ventilated area, wear gloves and safety goggles, and avoid skin contact. Use a UV lamp with proper shielding to protect your eyes from UV exposure.
2. **Question:** How can you achieve a smooth finish with UV resin?
**Answer:** To achieve a smooth finish, ensure the surface is clean and free of dust, apply the resin in thin layers, and use a heat gun or torch to remove bubbles before curing.
3. **Question:** What is the best way to cure UV resin effectively?
**Answer:** Position the UV resin under a UV lamp or sunlight, ensuring it is evenly exposed to the light source for the recommended curing time, typically 2-5 minutes, depending on the resin and light intensity.Working with UV resin for precision modeling offers numerous advantages, including the ability to create highly detailed and intricate designs, quick curing times, and a smooth finish. Its versatility allows for various applications, from miniatures to prototypes. However, it requires careful handling and safety precautions due to its chemical properties. Overall, UV resin is an excellent choice for hobbyists and professionals seeking precision and quality in their modeling projects.