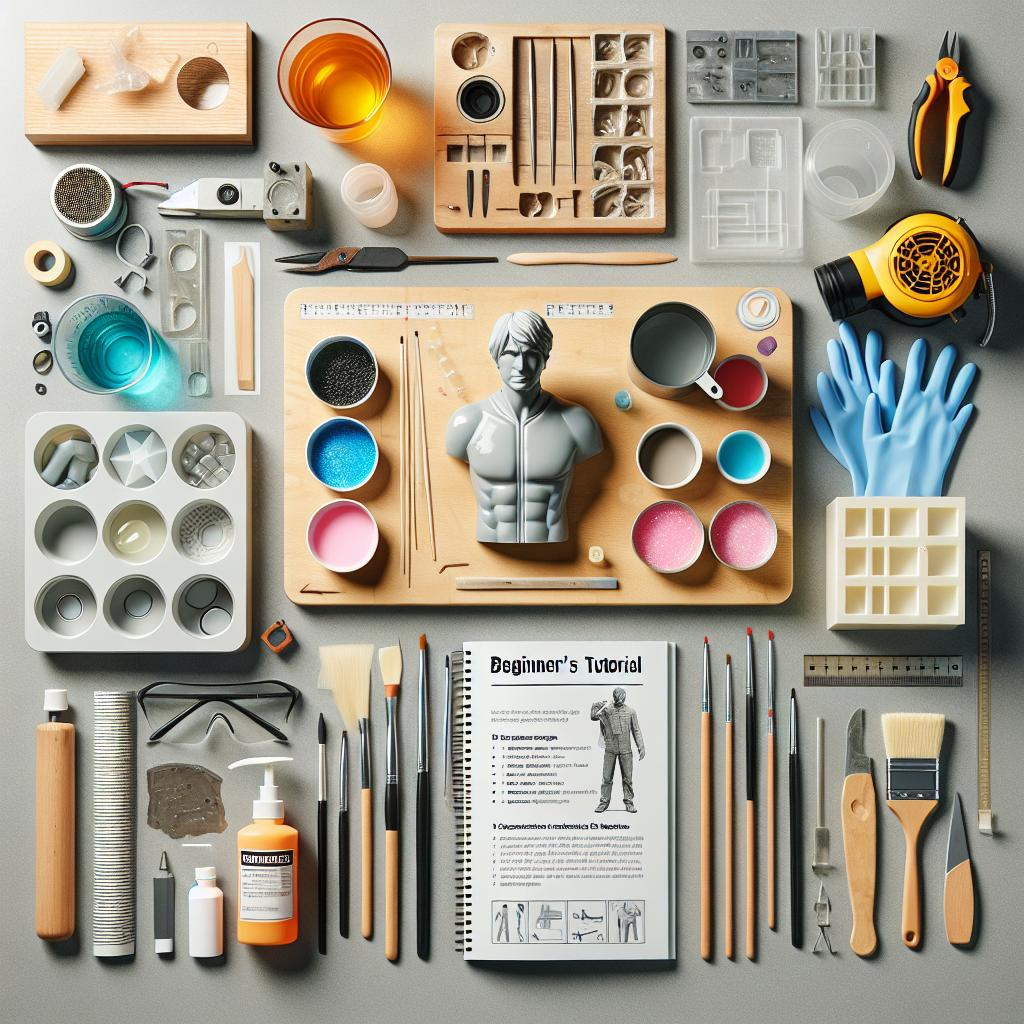
Essential Tools and Materials for Resin Modeling
Resin modeling is an engaging and rewarding hobby that allows enthusiasts to create intricate and detailed models, whether for display, gaming, or personal enjoyment. To embark on this creative journey, it is essential to gather the right tools and materials that will facilitate the modeling process and ensure successful outcomes. Understanding the fundamental components of resin modeling will not only enhance the experience but also improve the quality of the finished product.
First and foremost, selecting the appropriate resin is crucial. There are various types of resin available, with epoxy and polyurethane being the most common for modeling purposes. Epoxy resin is known for its clarity and strength, making it ideal for detailed projects, while polyurethane resin is often favored for its quick curing time and versatility. When choosing resin, it is important to consider the specific requirements of the project, such as the desired finish and the complexity of the model.
In addition to resin, a reliable mold is necessary for shaping the material. Molds can be purchased or created from silicone, which is flexible and allows for easy demolding. When creating a mold, it is essential to ensure that it is properly sealed and free of air bubbles to achieve a smooth finish on the final model. Furthermore, investing in high-quality mold-making materials will yield better results and prolong the life of the mold itself.
Once the resin and mold are selected, the next step involves gathering essential tools for the modeling process. A set of mixing cups and stir sticks is vital for accurately measuring and combining the resin components. It is advisable to use disposable cups to avoid contamination and ensure a clean mixing process. Additionally, a digital scale can provide precise measurements, which is particularly important when working with two-part resins that require specific ratios.
Safety should always be a priority when working with resin, as the materials can emit harmful fumes. Therefore, a well-ventilated workspace is essential. A respirator mask and nitrile gloves are also recommended to protect against skin irritation and inhalation of fumes. By taking these precautions, beginners can enjoy the modeling process without compromising their health.
Moreover, having a variety of sculpting tools on hand will greatly enhance the modeling experience. Tools such as spatulas, sculpting knives, and dental picks can assist in shaping and detailing the resin once it has cured. These tools allow for precision work, enabling the modeler to achieve intricate designs and fine details that elevate the overall quality of the project.
In addition to sculpting tools, a good set of paints and brushes is necessary for finishing touches. Acrylic paints are often preferred for their ease of use and quick drying time. A selection of brushes in various sizes will allow for detailed painting and finishing, ensuring that the model looks polished and professional. Furthermore, a clear coat can be applied to protect the paint and enhance the model’s appearance.
Finally, a dedicated workspace equipped with adequate lighting and organization will facilitate a smoother modeling process. Having a designated area for resin modeling not only helps in maintaining focus but also ensures that all tools and materials are easily accessible. By creating an organized environment, beginners can immerse themselves in their projects and enjoy the creative process to the fullest.
In conclusion, getting started with resin modeling requires careful consideration of essential tools and materials. By selecting the right resin, molds, and tools, as well as prioritizing safety and organization, beginners can embark on a fulfilling journey into the world of resin modeling, ultimately leading to the creation of stunning and intricate models.
Step-by-Step Process for Mixing and Pouring Resin
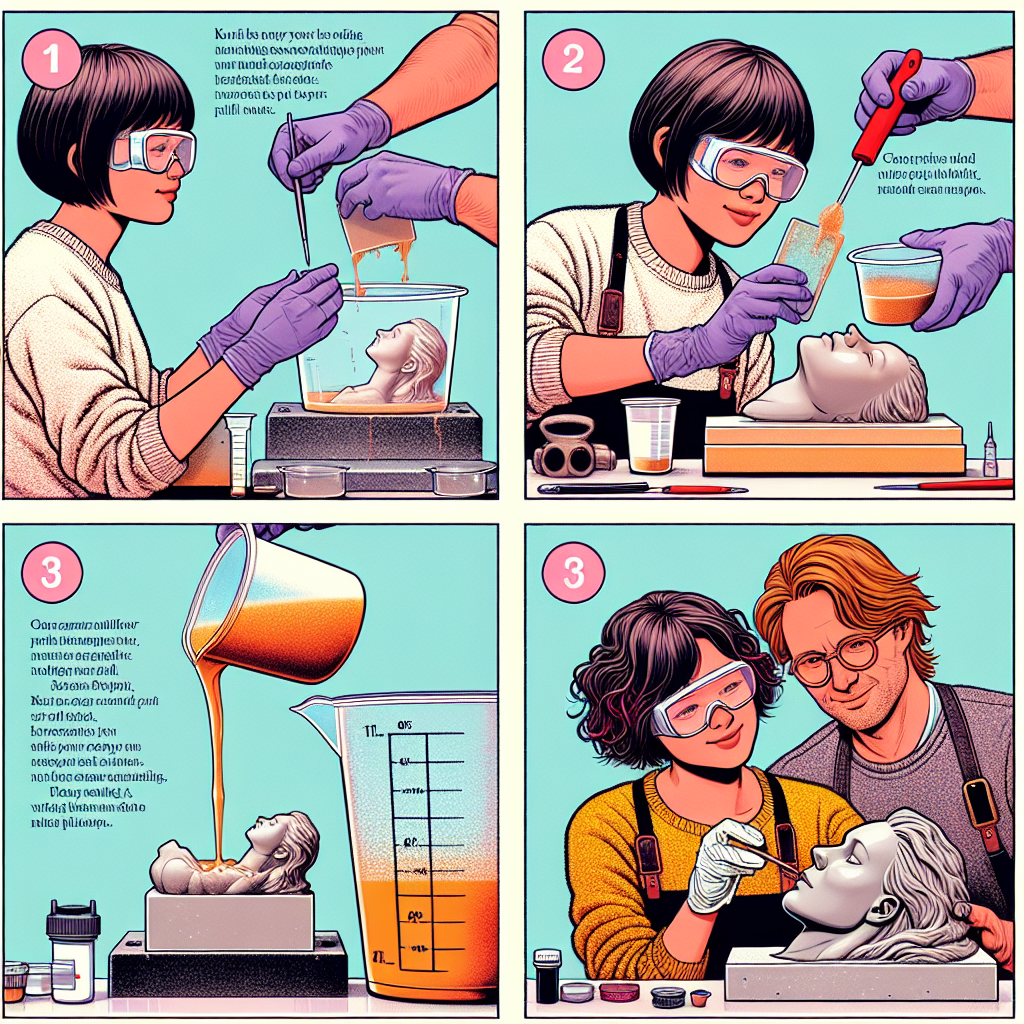
Getting started with resin modeling can be an exciting venture, especially for beginners eager to explore the creative possibilities that resin offers. The process of mixing and pouring resin is fundamental to achieving successful results, and understanding the step-by-step procedure is essential for anyone looking to embark on this artistic journey. To begin, it is crucial to gather all necessary materials, which typically include epoxy resin, hardener, mixing cups, stirring sticks, and protective gear such as gloves and a mask. Ensuring that you have a clean, well-ventilated workspace is also vital, as resin can emit fumes that may be harmful if inhaled.
Once you have prepared your workspace and gathered your materials, the next step is to measure the resin and hardener accurately. Most epoxy resins require a specific mixing ratio, often expressed in parts by volume or weight. It is imperative to follow the manufacturer’s instructions closely, as deviating from the recommended ratio can lead to incomplete curing or other undesirable results. Using separate measuring cups for the resin and hardener, carefully pour the components into a clean mixing cup. This precision in measurement is crucial, as it directly impacts the final outcome of your project.
After measuring, the next phase involves mixing the resin and hardener thoroughly. Using a stirring stick, gently mix the two components together, ensuring that you scrape the sides and bottom of the cup to incorporate all material evenly. It is advisable to mix slowly to minimize the introduction of air bubbles, which can mar the surface of your finished piece. Continue stirring for the duration specified by the manufacturer, typically around three to five minutes, until the mixture becomes clear and uniform. This clarity indicates that the resin and hardener have been adequately combined.
Once the resin is mixed, it is time to pour it into your prepared mold or onto your chosen surface. Before pouring, ensure that your mold is clean and free of dust or debris, as these can affect the final appearance of your project. When pouring, it is beneficial to do so from a height of about six inches, allowing the resin to flow gently into the mold. This technique helps to reduce the formation of bubbles, as the resin can spread more evenly. If you notice any bubbles forming during the pour, you can use a heat gun or a torch to gently pass over the surface, which will help to pop the bubbles and create a smooth finish.
After pouring, it is essential to allow the resin to cure undisturbed. The curing time can vary depending on the specific product used, but it typically ranges from several hours to a full day. During this time, it is crucial to keep the project in a dust-free environment to prevent any particles from settling on the surface. Once the resin has fully cured, you can demold your piece and assess the results. If necessary, additional finishing touches such as sanding or polishing can be applied to achieve the desired look.
In conclusion, the process of mixing and pouring resin is a straightforward yet meticulous endeavor that requires attention to detail and adherence to safety precautions. By following these steps carefully, beginners can create stunning resin pieces that showcase their creativity and craftsmanship. With practice and patience, the world of resin modeling can open up a myriad of artistic possibilities, allowing for endless exploration and innovation.
Tips for Finishing and Painting Your Resin Models
Finishing and painting resin models is a crucial step in the modeling process that can significantly enhance the overall appearance and realism of your creations. As a beginner, understanding the nuances of this stage will not only improve your skills but also elevate your enjoyment of the hobby. To begin with, it is essential to prepare your resin model properly before applying any paint. This preparation involves cleaning the model to remove any release agents or dust that may have accumulated during the casting process. A simple wash with warm, soapy water followed by a thorough rinse and drying will suffice. This step is vital, as any residue left on the surface can prevent paint from adhering properly, leading to unsatisfactory results.
Once your model is clean and dry, the next step is to inspect it for any imperfections, such as air bubbles or seams. These flaws can detract from the final appearance, so it is advisable to address them before painting. Using a fine-grit sandpaper or a hobby knife, you can carefully smooth out any rough areas or fill in gaps with a suitable filler. After sanding, it is prudent to wash the model again to remove any dust created during this process. This attention to detail will ensure a smooth surface for painting.
After preparing the model, the application of a primer is highly recommended. Priming serves multiple purposes: it provides a uniform surface for the paint to adhere to, enhances the vibrancy of the colors, and helps to identify any remaining imperfections that may need further attention. When selecting a primer, consider using an aerosol spray or an airbrush for an even coat. It is advisable to apply the primer in thin layers, allowing each coat to dry completely before applying the next. This method not only prevents drips and runs but also ensures a smooth finish.
Once the primer has dried, you can begin the painting process. It is beneficial to start with the base colors, applying them in thin layers to build up the desired opacity gradually. Acrylic paints are often favored for their ease of use and quick drying times, making them an excellent choice for beginners. Additionally, using a wet palette can help keep your paints workable for longer periods, allowing for smoother application. As you paint, remember to use a variety of brush sizes to achieve different effects, from broad strokes for larger areas to fine brushes for intricate details.
As you progress, consider incorporating techniques such as shading and highlighting to add depth and dimension to your model. For shading, you can use a darker tone of your base color, applying it in the recesses to create the illusion of depth. Conversely, highlighting involves using a lighter shade to accentuate raised areas, thereby enhancing the three-dimensionality of the model. These techniques can significantly elevate the realism of your finished piece.
Finally, once you are satisfied with the paint job, sealing your model with a clear coat is advisable. This protective layer not only enhances the durability of the paint but also provides a uniform finish, whether you prefer a matte, satin, or glossy look. In conclusion, finishing and painting your resin models requires patience and practice, but by following these steps and techniques, you will be well on your way to creating stunning pieces that reflect your artistic vision. As you gain experience, you will develop your own style and preferences, making the journey of resin modeling all the more rewarding.